HP Deskjet 2548 Wireless Setup Guide
To connect the HP Deskjet 2548 series to a wireless network using WPS, you will need the following:- A wireless 802.11b/g/n network that includes a WPS-enabled wireless router or access point. The HP Deskjet 2548 series only supports connections using 2.4GHz.
- A desktop computer or laptop is with either wireless networking support, or a network interface card (NIC). The computer must be connected to the wireless network that you intend to install the HP Deskjet 2548 series on.
HP Wireless Setup
HP Deskjet 2548 Wireless Setup Push Button Configuration (PBC) method
- Press and hold the Wireless button on the printer for more than 3 seconds to start WPS push mode. The Wireless status light starts blinking.
- Press the WPS button on your router.
- Press the Wireless button and Start Copy Black button at the same time to print the network configuration page, and then locate a WPS PIN. The WPS PIN is printed at the top of the printed information page.
- Press and hold the Wireless button from the printer control panel for more than 3 seconds. The Wireless status light starts blinking.
- Open the configuration utility or software for the wireless router or wireless access point, and then enter the WPS PIN. For more information about using the configuration utility, see the documentation provided with the router or wireless access point. Wait for about 2 minutes. If the printer connects successfully, the wireless light stops blinking but remains lit.
To connect the HP 2548 series to an integrated wireless WLAN 802.11 network, you will need the following:
- A wireless 802.11b/g/n network that includes a wireless router or access point.
- NOTE: The HP Deskjet 2548 series only supports connections using 2.4GHz.
- A desktop computer or laptop with either wireless networking support, or a network interface card (NIC). The computer must be connected to the wireless network that you intend to install the HP Deskjet 2548 series on.
- Network name (SSID).
- WEP key or WPA Passphrase (if needed).
- Insert the printer software CD in the computer CD-ROM drive. Do not connect the USB cable to the printer until you are prompted to do so.
- Follow the on-screen instructions. When you are prompted, connect the product to the computer by selecting Wireless in the Connection Options screen. Follow the on-screen prompts to enter your wireless network settings. The printer will attempt to connect to the network. If the connection fails, follow the prompts to correct the problem, and then try again.
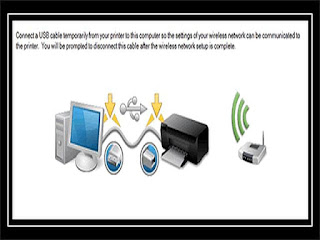
- When the setup is finished, you will be prompted to disconnect the USB cable and test the wireless network connection. Once the printer connects successfully to the network, you will not need USB cable when installing the printer on the subsequent computers. Instead, the printer name will appear in the network list and you can select it directly.
If you have not connected the printer to your computer, or you want to connect another new printer of the same model to your computer, you can use the Connect a new printer function to set up the connection.
Use this method if you have already installed the printer software.
1.Depending on your operating system, do one of the following:
- Windows 10/8: On the Start screen, right-click an empty area on the screen, click All Apps on the app bar.
- Windows 7, Windows Vista, and Windows XP: From the computer desktop, click Start, select All Programs, click HP, click HP Deskjet 2548 series.
3. Select Connect a new printer. Follow the on-screen instructions.
This method is available if you have already installed the printer software.
This method requires a USB cable. Do not connect the USB cable until prompted to do so.
1. Depending on your operating system, do one of the following:
- Windows 10/8: On the Start screen, right-click an empty area on the screen, click All Apps on the app bar.
- Windows 7, Windows Vista, and Windows XP: From the computer desktop, click Start, select All Programs, click HP, click HP Deskjet 2548 series.
3. Select Reconfigure Wireless Settings. Follow the on-screen instructions
HP Deskjet 2548 USB Connection (non-network connection)
The Deskjet 2548 series supports a rear USB 2.0 High Speed port for connection to a computer.
To connect the printer with the USB cable
- Insert the printer software CD in the computer CD-ROM drive. Do not connect the USB cable to the printer until you are prompted to do so.
- Follow the on-screen instructions. When you are prompted, connect the printer to the computer by selecting USB on the Connection Options screen.
- Follow the on-screen instructions.
HP 2548 Change from a USB connection to a wireless network
If you first set up your printer and installed the software with a USB cable, directly connecting the printer to your computer, you can easily change to a wireless network connection. You will need a wireless 802.11b/g/n network that includes a wireless router or access point.
The HP Deskjet series only supports connections using 2.4GHz. Before changing from a USB connection to a wireless network, make sure that:
- The printer is connected to your computer with the USB cable until you are prompted to disconnect the cable.
- The computer is connected to the wireless network that you intend to install the printer on. Change from a USB connection to a wireless network
- Windows 8: On the Start screen, right-click an empty area on the screen, click All Apps on the app bar.
- Windows 7, Windows Vista, and Windows XP: From the computer desktop, click Start, select All Programs, click HP, click HP Deskjet 2548 series.
3. Select Convert a USB connected printer to wireless. Follow the on-screen instructions.
Advertisement

